Screen-recording or screen-casting is used to record instructional tutorial videos, mostly for educational purposes. Now with the help of Camtasia Studio, you can create screen-recordings for your online courses, YouTube tutorials and much more with a touch of extra features.
Camtasia Studio is a popular screen-casting tool as it is super easy to use and it comes along with lots of additional video editing options. But no matter how easy it may seem to use a tool/software, it is always a good idea to do a little background research before you actually get started and to wind up your time.
So, let’s take you through a step by step guide to make your first screen-casting experience easy.

Step1: Record Screen
You
can record your screen both in windows laptop or mac using Camtasia Studio.
To do that:
- Open Camtasia studio
- Go to the top left corner
- Hit on record Screen
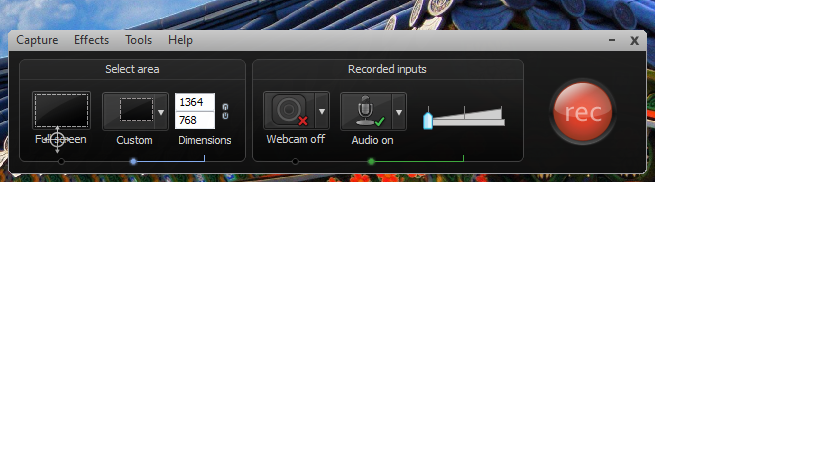
An additional new window will open, which will look like the one in the screenshot below.
Adjust your recording preference and tap on the red colored Rec button. And to stop your screen-recording simply press F10.
Import Media
You can import files such as images, videos, audio, etc. from your PC as well from Google Drive.
- Go to Top ribbon
- Tap on Import media

Record Webcam
The best and our most liked feature of Camtasia Studio is Webcam recording.
Yes, you hear it right, now you don’t need to create separate personal video recording. Record your screen and yourself at the same time to create an engaging user interface experience.
- Go to center ribbon; just above your timeline
- Tap on record camera
- Adjust your preferences of audio/video and press ok

Add Transition Effects
You can also add pre-built or themed templates, transition effects or animations just by simply using drag or drop functions.
- Tap on Add Transition
- Choose your desired Transition effect
- Drag/drop the transition into your timeline
- Preview your transition in the preview pane to check if it looks fine

Add Audio/Video Effects
You can add or adjust audio/video settings. There is also a pre-built library in the Camtasia studio and from there you can find or add audio/music, video effects, templates, themes, and other related material.

Add Callout
Add pre-built or customized call outs to grab and hook the attention of your audience.
- Tap on callout
- An additional window will open on the right of the preview pane
- Choose callout shapes, add text, borders, effects and press ok

Add Quizzes
If you are creating course videos, then adding quizzes is a very important and necessary step. With Camtasia Studio you can also add quizzes or quiz questions to your screencast.
- Go to and tap on Quizzes option
- An additional window will open
- Create quiz questions and answer options and press ok

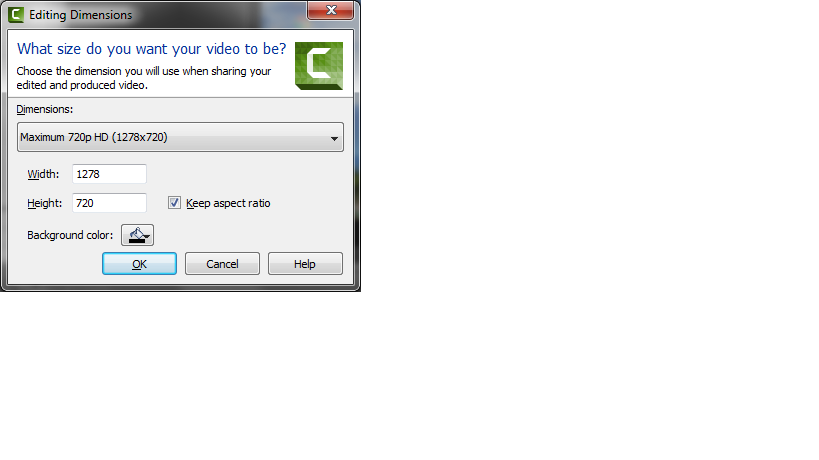
Customize Video Size
You can also adjust or customized your screencast video size and quality.
- On the top ribbon and tap on 1278×270
- An additional window will open and from there you can adjust the length, width, and quality of your video
Share your Screencast
Once you’re done with creating your project, you can share your screencast video directly from Camtasia studio to online forums such as YouTube, Vimeo and screencast dot com.
- Simply press produce and share button
- Choose sharing forum and press ok
Or you can save the video into your pc library by going to File>Save As on the top ribbon.

With all the above discussed points, we conclude Camtasia Studio is a use screencast tool because of its ease to use and plenty of pre-built editing tools and especially webcam recording. Also to use Camtasia Studio you don’t need to be a genius or an expert, anyone can do create screencasts using it with just a little effort.