What’s Trello?
Trello is the coolest and an easy to use online project management tool which is most popular in the market at the present. With Trello you can create multiple projects, assign tasks to your team members, and can track the progress of each step.
So, who should use Trello?
Whether you’re a student working on an academic project, a teacher who wants to
plan semester course work , an employer who wants to assign tasks to his team,
a blogger who wants to create a long-term blog plan, a traveler who to create
bucket list, a book reading enthusiast who want to create a reading library or
schedule, a creative agency or a big organization, or you just want to organize
your daily routine tasks, then Trello is the best tool for you!
Here’s a step by step guide on how to get you rolling with Trello!
Add Project Name
First, go to Trello’s website where you can sign up for free, either creating a new account or using an existing Gmail account.
Once you’re done with one-click sign-up, add the project name you want to work on. Just like in the picture below let’s assume you want to work on Brand Management Project.

Create Lists
Next step is to create lists you want to work on. For example, in the picture below the lists are named as “Things To Do”, “Doing” and “Done” or you can create list names of your own choice.

Create Cards
Each further category of a list is called a card. For example, in our Brand Management project, we have added three lists. Let’s say we add three additional cards in the “Things To Do” list as our project deliverables named:
- Brand Introduction
- Marketing Strategy
- Financial Planning

Create Boards
Once you’re done assigning project name, creating lists and cards, you will be then directed to your Trello board or simply your Trello workspace.
Trello Board is where all your work is placed, done, shared or in simple words where your project work is managed.
You can also create multiple project boards for your every project in Trello.

Create a Team
Creating a team is very simple. Just tap on the Trello logo on the top center of your board and you will be directed to another page. It will look like in the picture below.
On the left corner, tap on create a team and add participant’s name and click create.

Notifications
The notification function helps you keep on the track on what’s being done, by whom and when. Now you will never miss a thing.

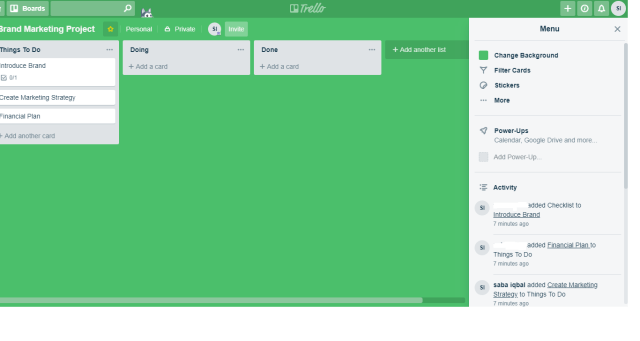
Menu
The menu option shows your project activity, it also gives options to change board background, add card filters, stickers, Power-ups, and much more.

Trello Power-Ups
Power
Ups in Trello are just like extensions are in Google Chrome. These are additional
tools you can add to your Trello board to manage your projects more
effectively.
You can add/drop the power-ups as you wish, depending on the Trello price
package you’ve subscribed.

Create A Shareable Board Link
Just like many other online workspaces you can also create a shareable link with Trello. Using this link anyone can view your project board.
Go to the right corner, tap on menu and at the end of it you will see an automatically generated board link of your project.

Trello’s diversity and ease to use with interesting features show that it is almost for everyone- simply one tool for all. One can share his/her Trello board with public or can keep it privately. The online collaboration has made it easy to interact with team members even if you’re sitting at the other corner of the world.

